ANSI Symbol | J | Iron/Constantan | | N | OMEGA-P™, OMEGA-N™ |
| K | CHROMEGA™/ALOMEGA™ | | R | Pt 13% Rh/Pt |
| T | Copper/Constantan | | S | Pt 10% Rh/Pt |
| E | CHROMEGA™/Constantan | | B | Pt 6% Rh/Pt 30% Rh |
Table 1 Maximum Service Temperature Thermocouple
Type | 0.13 mm
(0.005") | 0.38 mm
(0.015") | 0.51 mm
(0.020") | 0.81 mm
0.032 |
J**
K
N
T
E
R,S
B | 315°C (600°F)
593°C (1100°F)
593°C (1100°F)
149°C (300°F)
315°C (600°F)
-
- | 371°C (700°F)
871°C (1600°F)
871°C (1600°F)
204°C (400°F)
426°C (800°F)
-
- | 371°C (700°F)
871°C (1600°F)
871°C (1600°F)
204°C (400°F)
426°C (800°F)
1450°C (2642°F)
1700°C (3092°F) | 482°C (900°F)
982°C (1800°F)
982°C (1800°F)
260°C (500°F)
593°C (1100°F)
1450°C (2642°F)
1700°C (3092°F) |
Table 1 lists maximum service temperatures for long term exposures of bare wire thermocouples. For very short exposure times, temperatures of the fine gage thermocouples can be as high as the permissible temperatures for the 0.8 mm (0.032") diameter thermocouples.
** Do not expose to oxidizing atmospheres. Table 2 Response Time * Wire Size
mm (inches) | Still Air
427°C/38°C
800°F/100°F | 60 ft./sec Air
427°C/38°C
800°F/100°F | Still H2O
93°C/38°C
200°F/100°F |
0.025 (0.001)
0.125 (0.005)
0.381 (0.015)
0.75 (0.032) | 0.05 sec
1.0 sec
10.0 sec
40.0 sec | 0.004 sec
0.08 sec
0.80 sec
3.2 sec | 0.002 sec
0.04 sec
0.40 sec
1.6 sec |
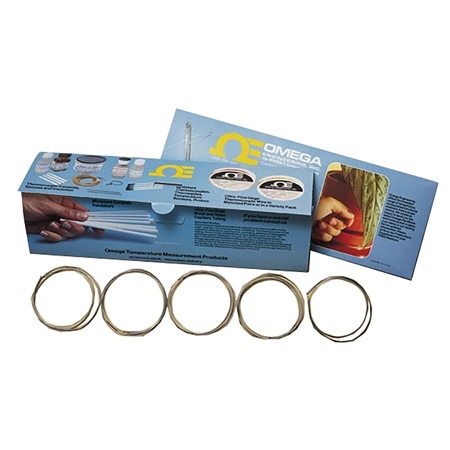
*The time constant is defined as the time required to reach 63.2% of an instantaneous temperature change. The data for Table 2 are obtained by measuring the time required for a Type J fine gage thermocouple to reach 63.2% of its final temperature when its junction is alternately exposed to two different temperature levels. In this case, the time constant was measured for exposures between 427°C (800°F) and 38°C (100°F) air between 93°C (200°F) and 38°C (100°F) water. Fine Gage Thermocouples OMEGA™ fine wire thermocouples are used whenever fast, accurate temperature measurements are required. The fine wire diameters enable accurate temperature measurements without disturbing the base temperature of the body, in which the installation is made, by keeping heat transfer via the leads to a minimum. Also, the fine junction permits accurate “pin-pointing” of the measured values. They are available in wire sized ranging from 0.001" to 0.032" in diameter. All fine gage thermocouples are made from carefully selected materials. To insure consistent thermoelectric properties, each package contains thermocouples made from matched pairs of wire within the same lot number. When specified, several packages of thermocouples made from the same lot number can be supplied at no extra charge.
Response Time While thermocouple response is a function of medium of submersion, wire diameter, alloy type and temperature level, it is possible to use Table 2 as a guide for comparing the various wire size thermocouples.
Important Ordering Notes Base Metal Thermocouples
Prices given for 12 inch lengths (package of 5). Other sizes and lengths are available on special order. A 12 inch length corresponds to a 24 inch loop. To order longer lead lengths for base metal calibrations, add $4 per foot per package.
Platinum/Rhodium Thermocouples Prices given for 6 inch lengths (sold individually). Other sizes and lengths are availableon special order. A 6 inch length corresponds to a 12 inch loop. To order longer lead lengths for Pt/Rh calibrations, see the table below.
Base Metal Calibrations: 300 mm (12") Length Standard | Calibration | Wire Dia.
mm (in) | Model
Number | J
Iron
Constantan | 0.050 (0.002)
0.075 (0.003)
0.125 (0.005)
0.25 (0.010)
0.38 (0.015)
0.5 (0.020)
0.81 (0.032) | IRCO-002
IRCO-003
IRCO-005
IRCO-010
IRCO-015
IRCO-020
IRCO-032 | T
Copper
Constantan | 0.050 (0.002)
0.075 (0.003)
0.125 (0.005)
0.25 (0.010)
0.38 (0.015)
0.5 (0.020)
0.81 (0.032) | COCO-002
COCO-003
COCO-005
COCO-010
COCO-015
COCO-020
COCO-032 | N
OMEGA-P™
OMEGA-N™ | 0.075 (0.003)
0.125 (0.005)
0.25 (0.010)
0.50 (0.020)
0.81 (0.032) | OPON-003
OPON-005
OPON-010
OPON-020
OPON-032 | | | Calibration | Wire Dia.
mm (in) | Model
Number | K
CHROMEGA™
ALOMEGA™ | 0.050 (0.002)
0.075 (0.003)
0.125 (0.005)
0.25 (0.010)
0.38 (0.015)
0.50 (0.020)
0.81 (0.032) | CHAL-002
CHAL-003
CHAL-005
CHAL-010
CHAL-015
CHAL-020
CHAL-032 | E
CHROMEGA™
Constantan | 0.050 (0.002)
0.075 (0.003)
0.125 (0.005)
0.25 (0.010)
0.38 (0.015)
0.50 (0.020)
0.81 (0.032) | CHCO-002
CHCO-003
CHCO-005
CHCO-010
CHCO-015
CHCO-020
CHCO-032 | |
Pt/Rh Calibrations: 150 mm (6") Length Standard – Sold Individually | Calibration | Wire Dia.
mm (in) | Model
Number | R
Pt/13%Rh-
Pt | 0.025 (0.001)
0.050 (0.002)
0.075 (0.003)
0.125 (0.005)
0.20 (0.008)
0.25 (0.010)
0.38 (0.015)
0.50 (0.020)
0.81 (0.032) | P13R-001
P13R-002
P13R-003
P13R-005
P13R-008
P13R-010
P13R-015
P13R-020
P13R-032 | | | Calibration | Wire Dia.
mm (in) | Model
Number | S
Pt/10%Rh-
Pt | 0.025 (0.001)
0.050 (0.002)
0.075 (0.003)
0.125 (0.005)
0.20 (0.008)
0.25 (0.010)
0.38 (0.015)
0.50 (0.020)
0.81 (0.032) | P10R-001
P10R-002
P10R-003
P10R-005
P10R-008
P10R-010
P10R-015
P10R-020
P10R-032 | |
Pt/Rh Calibrations: 150 mm (6") Length Standard – Sold Individually | Calibration | Wire Dia.
mm (in) | Model
Number | B
Pt/30%Rh-
Pt/6%Rh- | 0.20 (0.008)
0.25 (0.010)
0.38 (0.015)
0.50 (0.020)
0.81 (0.032) | P30R-008
P30R-010
P30R-015
P30R-020
P30R-032 | | |
View the Thermocouple Accuracy and Color Code charts 